Electroculture is a fascinating and innovative method that harnesses the power of electricity to enhance plant growth and productivity. This technique, which has been gaining popularity among gardening enthusiasts and organic farmers, involves the use of an electroculture antenna to capture atmospheric electricity and direct it towards plants. In this article, we will delve into the details of how to build an electroculture antenna, offering a step-by-step guide that is easy to follow. By the end, you will have a clear understanding of how to create and use this device to boost your gardening efforts.
Understanding Electroculture
Before we jump into the specifics of how to build an electroculture antenna, it’s essential to understand what electroculture is and how it benefits plant growth. Electroculture uses atmospheric electricity or artificially generated electric fields to stimulate the growth of plants. This method can improve germination rates, increase yield, and enhance overall plant health without the need for chemical fertilizers or pesticides.

Benefits of Electroculture
- Enhanced Growth: Plants exposed to electrical fields often show improved growth rates, healthier foliage, and stronger roots.
- Increased Yield: Many gardeners report a significant increase in the yield of their crops after implementing electroculture techniques.
- Sustainable Gardening: By reducing the need for chemical inputs, electroculture promotes a more sustainable and eco-friendly approach to gardening.
- Cost-Effective: Once set up, an electroculture antenna requires minimal maintenance, making it a cost-effective solution for improving plant productivity.
Materials Needed
To embark on the journey of how to build an electroculture antenna, gather the following materials:
- Copper wire: Preferably 12-14 gauge, as it conducts electricity effectively.
- Wooden or metal rod: This will serve as the main support for your antenna.
- Insulating tape: To secure connections and protect the wire.
- Grounding rod: Essential for safely grounding the antenna.
- Alligator clips: For easy and secure electrical connections.
- Multimeter: To test and ensure proper electrical connections.
Step-by-Step Guide : How to Build an Electroculture Antenna
Step 1: Prepare the Copper Wire
Begin by measuring and cutting a length of copper wire suitable for your garden size. A length of 3 to 5 meters is typically sufficient. Using a wire stripper, remove the insulation from both ends of the wire to expose the copper.
Step 2: Create the Coil
Next, create a coil with the copper wire. Wrap the wire around a cylindrical object, such as a PVC pipe, to form a tight, even coil. This coil will act as the main component of your electroculture antenna, capturing atmospheric electricity.

Step 3: Mount the Coil
Mount the copper coil onto a wooden or metal rod. The rod should be tall enough to stand above your plants, ensuring the coil can effectively capture atmospheric electricity. Secure the coil to the rod using insulating tape, making sure it is stable and won’t easily come loose.
Step 4: Ground the Antenna
Proper grounding is crucial for the safe and effective operation of your electroculture antenna. Connect one end of the coil to a grounding rod using an alligator clip. Insert the grounding rod into the soil near your garden, ensuring it makes good contact with the earth.
Step 5: Test the Connections
Using a multimeter, test the electrical connections to ensure everything is set up correctly. Check for continuity in the coil and verify that there is a proper ground connection. This step is essential to confirm that your electroculture antenna is ready for use.
How to Make Electroculture Antenna DIY?
If you’re looking for a more customised approach, here’s a detailed guide on how to make an electroculture antenna DIY. This method allows you to tailor the antenna to your garden’s specific needs, offering a more hands-on experience.
DIY Materials
In addition to the basic materials listed above, you may also need:
- Aluminium foil: To enhance the conductivity of the coil.
- Plastic tubing: For additional insulation.
- Zip ties: To secure various components.
DIY Instructions
- Enhance Conductivity: Wrap the copper wire coil with aluminium foil to increase its conductivity. Ensure the foil is tightly wrapped and secure it with zip ties.
- Insulate the Coil: Insert the coil into plastic tubing to protect it from moisture and environmental damage.
- Adjust the Height: Use adjustable rods to customise the height of your antenna. This flexibility allows you to position the antenna optimally for your garden.
By following these DIY steps, you can create a highly efficient electroculture antenna tailored to your gardening needs.
Installation and Positioning
The positioning of your electroculture antenna is vital for its effectiveness. Here are some tips to help you place it correctly:
- Height: Ensure the antenna is placed above the plants to capture maximum atmospheric electricity. The taller the antenna, the better the results.
- Location: Choose a location with minimal obstructions. Avoid placing the antenna near tall buildings or trees that might block the atmospheric electricity.
- Spacing: If you have a large garden, consider setting up multiple antennas spaced evenly to cover the entire area.
Maintenance Tips
To ensure your electroculture antenna functions effectively, regular maintenance is necessary. Here are some tips:
- Check Connections: Regularly inspect the electrical connections for any signs of wear or damage. Ensure that the alligator clips are secure and the copper wire is intact.
- Clean the Antenna: Keep the coil and grounding rod clean and free from debris. This helps maintain good electrical conductivity.
- Monitor Plant Response: Observe your plants regularly to see how they respond to the electroculture method. Adjust the antenna height and positioning as needed.
Benefits of Using an Electroculture Antenna
Using an electroculture antenna in your garden can yield numerous benefits. Here are some of the key advantages:
Increased Plant Growth
The primary benefit of using an electroculture antenna is the potential for increased plant growth. The electrical energy harnessed by the antenna can stimulate plant cells, promoting faster and healthier growth.
Improved Soil Quality
An electroculture antenna can also improve soil quality by enhancing the natural electrical conductivity of the soil. This can lead to better nutrient absorption by plants and a more balanced soil ecosystem.
Reduced Need for Chemicals
By building and using an electroculture antenna, you can reduce your reliance on chemical fertilisers and pesticides. This makes electroculture a sustainable and eco-friendly alternative to traditional farming methods.
Cost-Effective Solution
Creating an electroculture antenna is a cost-effective solution for enhancing plant growth. The materials needed are inexpensive and readily available, making it an accessible option for gardeners of all skill levels.
Tips for Optimising Your Electroculture Antenna
To maximise the effectiveness of your electroculture antenna, consider the following tips:
Regular Maintenance
Regularly inspect your antenna for any signs of wear or damage. Ensure that the copper wire remains tightly wrapped and that the pole is stable and upright.
Proper Placement
Position your antenna in an area with good exposure to sunlight and air. Avoid placing it near metal structures or electrical lines, as these can interfere with its conductivity.
Experiment and Adjust
Don’t be afraid to experiment with different wire lengths and wrapping techniques. Adjusting these variables can help you find the optimal configuration for your specific gardening needs.
Monitor Plant Response
Keep track of how your plants respond to the electroculture antenna. Note any changes in growth rates, plant health, and soil quality. This will help you fine-tune your approach and achieve the best results.
Troubleshooting Common Issues
Even with careful setup, you might encounter some issues with your electroculture antenna. Here are some common problems and their solutions:
- Weak Electrical Output: If the antenna isn’t producing a strong electrical field, check the connections and ensure the coil is tightly wound and properly grounded.
- Interference: Nearby electronic devices can sometimes interfere with the electroculture antenna. Ensure that the antenna is placed away from such devices.
- Environmental Factors: Weather conditions like heavy rain or storms can affect the performance of the antenna. Regularly check and adjust the antenna to maintain its efficiency.
Can You Use Copper Pipe for Electroculture Antenna?
Yes, you can use copper pipe for an electroculture antenna. While copper wire is more commonly used due to its flexibility and ease of coiling, copper pipe can also be effective. The main challenge with using copper pipe for an electroculture antenna is its rigidity, which makes it harder to form into a coil. However, if you can securely mount the pipe and ensure proper grounding, it can function just as well as copper wire in capturing atmospheric electricity and promoting plant growth.
What Direction is the Spiral in Electroculture Antenna?
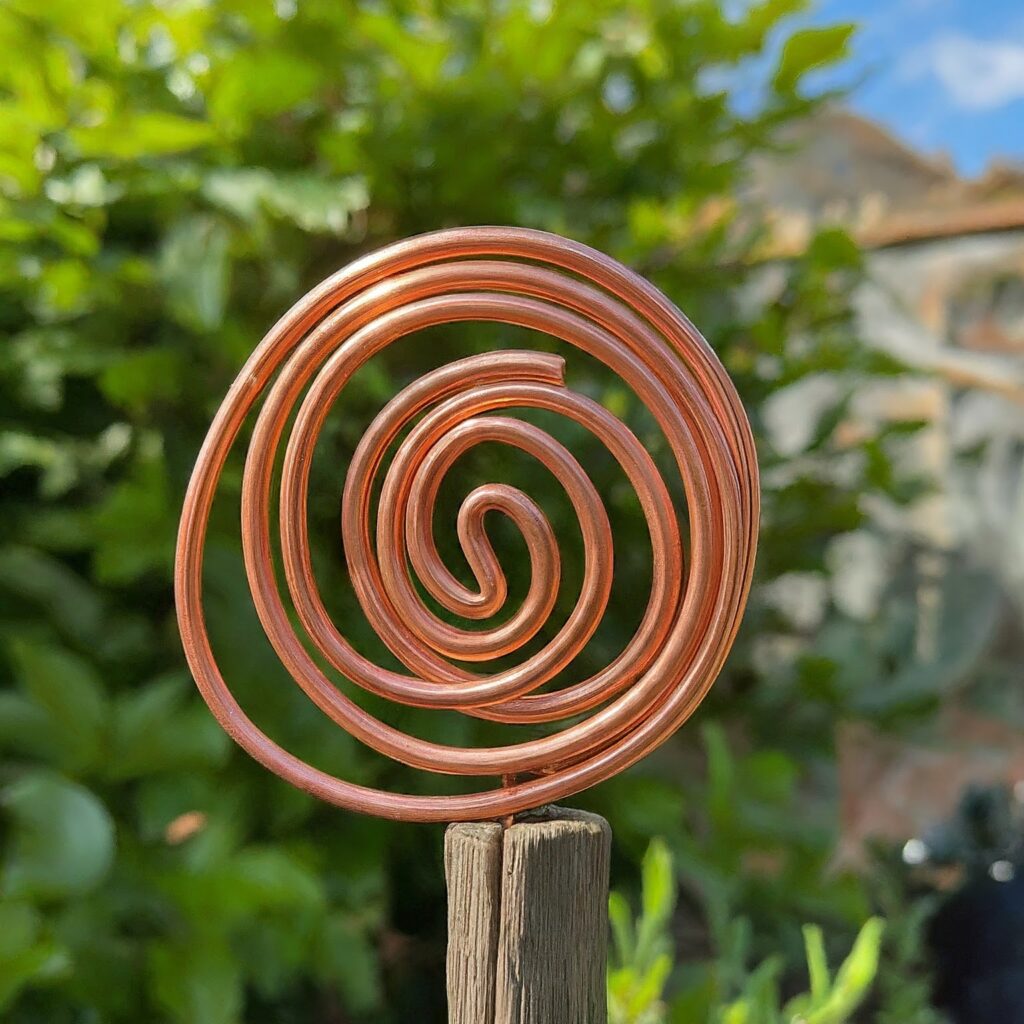
The direction of the spiral in an electroculture antenna is typically clockwise. This is based on the principle that a clockwise spiral aligns with the natural flow of energy in the environment. When wrapping copper for an electroculture antenna, creating a clockwise spiral is believed to enhance the antenna’s ability to capture and channel atmospheric electricity effectively, thereby boosting plant growth and health.
What is the Fibonacci Spiral in Electroculture Antenna?
The Fibonacci spiral in an electroculture antenna refers to a specific spiral pattern based on the Fibonacci sequence. This pattern is believed to align with natural growth patterns found in nature, such as the arrangement of leaves and seeds. Using a Fibonacci spiral for an electroculture antenna can potentially optimise the antenna’s efficiency in harnessing atmospheric electricity, providing a more harmonious and effective energy flow to the plants.
How to Wrap Copper for Electroculture Antenna?
To wrap copper for an electroculture antenna, start by selecting a suitable copper wire, preferably 12-14 gauge. Measure and cut the wire to your desired length, typically 3 to 5 meters. Form a coil by wrapping the wire around a cylindrical object, such as a PVC pipe, in a clockwise direction. Secure the coil with insulating tape to maintain its shape. Mount the coil on a sturdy rod and ensure proper grounding by connecting one end of the coil to a grounding rod. This method of wrapping copper for an electroculture antenna will help you effectively capture and direct atmospheric electricity to your plants.
Common Questions About Electroculture Antennas
Q: How long does it take to see results?
A: Results can vary depending on factors like plant type, soil quality, and environmental conditions. However, many users report noticeable improvements within a few weeks.
Q: Can I use other materials for the wire?
A: While copper is preferred due to its conductivity, other conductive materials like aluminium can also be used.
Q: Is electroculture safe for all plants?
A: Yes, electroculture is generally safe for all types of plants. However, it’s always good to monitor your plants for any unusual changes.
Conclusion
Building an electroculture antenna is a rewarding project that can significantly enhance your gardening efforts. By following the steps outlined in this guide on how to build an electroculture antenna, you can harness the power of atmospheric electricity to promote better plant growth and increased yields. Whether you opt for the standard method or a DIY approach, the benefits of electroculture are clear. Embrace this innovative technique and enjoy a more productive, sustainable garden.
