Greetings to Electroculture Magazine! 2023 marks the burgeoning rise of Electroculture, a captivating fusion of electricity and agriculture promising amplified crop yields. At its core lies the electroculture antenna, a vital element facilitating the transmission of electromagnetic frequencies to plants. This article delves into crafting an electroculture antenna, spotlighting the contemporary methods to harness this avant-garde technology. As interest surges in this innovative field, the exploration of ‘How do I make an electroculture antenna?’ in 2023 unveils the steps to leverage the advantages of this cutting-edge methodology, empowering enthusiasts with the tools to embrace and exploit its potential benefits for agricultural advancement.
As interest in electroculture continues to surge, enthusiasts and farmers alike are eager to explore its potential benefits. Crafting your electroculture antenna is an exciting endeavor that puts you on the front lines of this agricultural revolution.
Introduction : electroculture antenna
Atmospheric antennas are an unusual approach to increase plant growth, and you’d be amazed to hear that they can be made from inexpensive materials like wood dowels, which can be found at Home Depot, Lowes, or even in your own garden. The amazing thing is that the taller you create these antennae, the more prolific your plants will be. According to Justin Christofleau, a height of at least 20 feet is recommended, but you may experiment with other heights to find what works best for your garden.
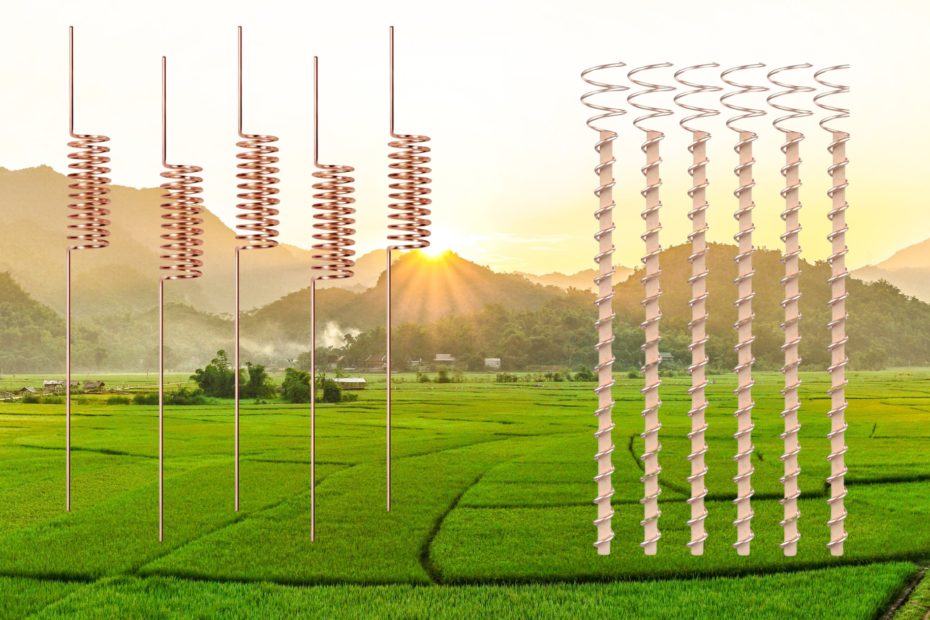
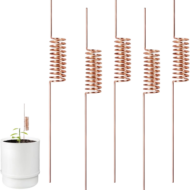
The distinctive design of these antennas is the secret to their effectiveness. Wrap a wooden dowel or locally obtained wood in copper and zinc wiring to create a stunning Fibonacci spiral or vortex construction that stretches aloft and points to Magnetic North. This design isn’t just for show; it also serves an important function in plant development.
When the sun’s rays strike the antenna, the magic happens. The zinc-copper alloy may efficiently operate as a battery, collecting and utilizing the sun’s energy. The true magic happens when you bury this antenna 6-8 inches into the earth and enable it to interact with the Earth’s inherent energy. It’s like plugging your plants into a strong, natural energy source and letting Mother Nature handle the rest.
The beauty of atmospheric antennas is that they allow you to be creative with their designs, experimenting with different forms and sizes. This enables you to fully realize the promise of electroculture, an intriguing approach to sustainable gardening. So, give it a shot and watch as your plants thrive and bloom with the assistance of these DIY atmospheric antennae. It’s a one-of-a-kind and environmentally responsible approach to improve your gardening experience.
Materials You’ll Need for DIY electroculture antenna
To embark on the exciting journey of creating your own electroculture antenna, you’ll need a few essential materials to get started. These components are not only readily available but also crucial to the success of your project.
1. Copper Wire:
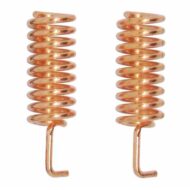
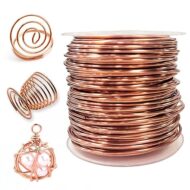
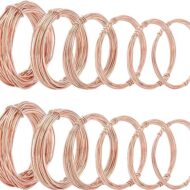
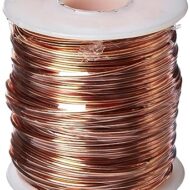
The fundamental component at the core of your electroculture antenna is a lengthy copper wire, typically spanning several feet. Renowned for its exceptional conductivity, copper serves as the primary conduit, crucial in the transmission of electromagnetic frequencies to nurture your plants. Acquiring copper wire is convenient, available at nearby hardware outlets or through various online retail platforms. Its conductive nature facilitates the efficient conveyance of vital electromagnetic signals, an essential element in fostering optimal growth and health for your cultivated flora within the electroculture system. Seek this essential resource readily, harnessing the power of copper for a flourishing plant environment.
2. Insulating Material:
Critical to the antenna’s efficacy, selecting appropriate insulating material is imperative. Optimal choices include plastic tubing or PVC pipes, serving as protective sheaths for the copper wire. These materials shield the wire, averting potential interferences that could disrupt the essential transmission of electromagnetic signals to your plants. It’s crucial to select a size that snugly accommodates the copper wire, ensuring proper insulation and unhindered signal propagation. Whether opting for flexible plastic tubing or rigid PVC pipes, their role in safeguarding the integrity of the signal path is pivotal, contributing significantly to the seamless conveyance of electromagnetic frequencies for the sustained growth and well-being of your cultivated greens.
3. Electrical Components: To generate the essential electromagnetic frequencies for your plants, you’ll require specialized electrical components. An electrical oscillator or frequency generator is the heart of your electroculture setup. These devices are designed to produce and control the specific frequencies that are known to stimulate plant growth. You can find electrical oscillators or frequency generators at electronics stores or online suppliers.
Once you’ve gathered these materials, you’ll be well-prepared to embark on your electroculture adventure. Building your electroculture antenna is not only a fascinating endeavor but also a sustainable way to boost plant growth. By combining copper wire, insulating materials, and electrical components, you can create a powerful tool that harnesses the forces of nature to enhance your garden’s vitality. Stay tuned to learn how to assemble and use these materials to create your own electroculture antenna and witness the incredible effects it can have on your plants.
Steps to Create Your Electroculture Antenna
Creating an electroculture antenna is a fascinating and sustainable endeavor. Here are the steps to guide you through the process of making your own antenna:
Step 1: Gather Your Materials
Before diving into the project, ensure you have all the necessary materials:
- Copper Wire: A long piece of copper wire, preferably a few feet in length.
- Insulating Material: Plastic tubing or PVC pipes to insulate the copper wire.
- Electrical Components: An electrical oscillator or frequency generator to produce electromagnetic frequencies for your plants.
- Wire Cutters: To trim the copper wire to the desired length.
- Electrical Tape: To secure and insulate wire connections.
Step 2: Cut and Prepare Copper Wire
- Using wire cutters, cut the copper wire to your desired length. A few feet is typically recommended, but you can adjust it to suit your garden’s size.
Step 3: Insulate the Copper Wire
- Slide the copper wire into the chosen insulating material, such as plastic tubing or PVC pipes. Ensure the entire length of the wire is well-insulated.
- Use electrical tape to secure the ends and any exposed portions of the wire. This step is crucial to prevent electrical interference and ensure the safety of your antenna.
Step 4: Set Up the Electrical Oscillator
- Connect your electrical oscillator or frequency generator to the copper wire. Follow the manufacturer’s instructions for the specific device you have.
- Configure the oscillator to generate the electromagnetic frequencies that have been shown to stimulate plant growth. Research and consult the device’s manual for guidance on the ideal frequencies.
Step 5: Position Your Antenna
- Find a suitable location in your garden for the electroculture antenna. It should ideally be outdoors where it can receive sunlight and rain.
- Place the antenna in the soil, burying it approximately 6-8 inches deep. Ensure the insulated copper wire extends above the ground level.
Step 6: Power Up Your Antenna
- Turn on your electrical oscillator or frequency generator, initiating the emission of the desired electromagnetic frequencies.
Step 7: Observe and Maintain
- Regularly monitor the progress of your plants. Over time, you should see improved growth and vitality.
- Keep the antenna in good condition, ensuring the insulating material remains intact and the electrical connections are secure.
Step 8: Experiment and Adjust
- Don’t be afraid to experiment with different frequencies and antenna heights to optimize plant growth.
By following these steps, you can create your electroculture antenna and tap into the incredible potential of electromagnetic frequencies to enhance the well-being of your garden. Remember to maintain and fine-tune your setup as you observe its effects on your plants, and enjoy the benefits of this eco-friendly gardening approach.
Final Words
Electroculture has emerged as a potential technique in the ever-changing world of agriculture and horticulture in 2023. Making your own electroculture antenna is not only a fun DIY project, but it is also an instructive trip into sustainable farming principles. Remember to embrace the spirit of exploration and discovery as you begin on this trip.
It is critical to acknowledge that in electroculture, there is no one-size-fits-all approach. The efficacy of frequencies and antenna location might vary based on the plants being grown. As a result, devoting time to study and experimenting is essential for realizing the full potential of electroculture in your garden.
In this age of sustainable agriculture, electroculture provides an exciting opportunity to not only increase the production of your garden but also contribute to the ever-growing knowledge base in this subject. You’ll be at the vanguard of this unique gardening strategy if you follow the procedures given and stimulate interest about the potential of electroculture. Traditional gardening practices combined with cutting-edge innovations such as electroculture hold the promise of a greener and more abundant future for your crops. So, take advantage of the chance, get your hands dirty, and watch your garden flourish thanks to the power of electroculture.
