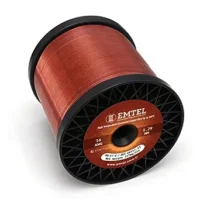
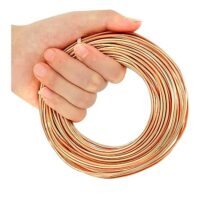
Choose the Correct Gauge Wire for Electroculture – Electroculture involves using electrical currents to enhance plant growth, improve yield, and increase overall agricultural efficiency. This agricultural technique leverages electrical energy to stimulate plant cells, improve nutrient uptake, and boost metabolic activities. It’s a method backed by various research studies and has shown promising results in controlled environments. Electroculture stands as a groundbreaking technique to boost agricultural productivity sustainably. Proper understanding and careful implementation are keys to realizing its full potential.
The Importance of Gauge Wire for Electroculture
Wire gauge is critical in electroculture for several reasons:
- Electrical Resistance:
- Thicker wires (lower gauge numbers) have less electrical resistance.
- Lower resistance ensures efficient transmission of electricity through the wire.
- Optimal resistance is crucial for effective electroculture practices.
- Electrical Load Capacity:
- Wire gauge determines the amount of current the wire can safely carry.
- Using a wire with an insufficient gauge can lead to overheating and potential hazards.
- Adequate gauge selection ensures system safety and longevity.
- Application Specificity:
- Different electroculture methods require varying wire gauges.
- For instance, inductive electroculture may benefit from thicker wires, while capacitive methods may require thinner wires.
- Choosing the correct gauge ensures the effectiveness of the specific electroculture technique.
- Material Considerations:
- Wire composition (copper, aluminum) also affects gauge selection.
- Copper wires offer higher conductivity, thus potentially requiring a smaller gauge compared to aluminum.
- Proper material and gauge pairing enhance the efficiency of electroculture.
- Environmental Factors:
- Environmental conditions (humidity, temperature) can influence wire performance.
- Thicker wires may be better suited for harsher environments to avoid degradation.
- Selecting the appropriate gauge helps mitigate environmental impact on wire conductivity.
Understanding wire gauge is essential in electroculture because it directly impacts the system’s effectiveness and safety. Skilled practitioners must consider multiple factors, such as resistance, load capacity, application specificity, material composition, and environmental conditions, to determine the appropriate gauge for their needs. Ensuring these variables are adequately addressed allows for successful implementation and maximizes the benefits of electroculture practices.
In summary, selecting the right wire gauge is indispensable in electroculture for achieving desired results while maintaining system integrity. This selection requires a thorough understanding of the interplay between various factors that influence wire performance in an electroculture setting.
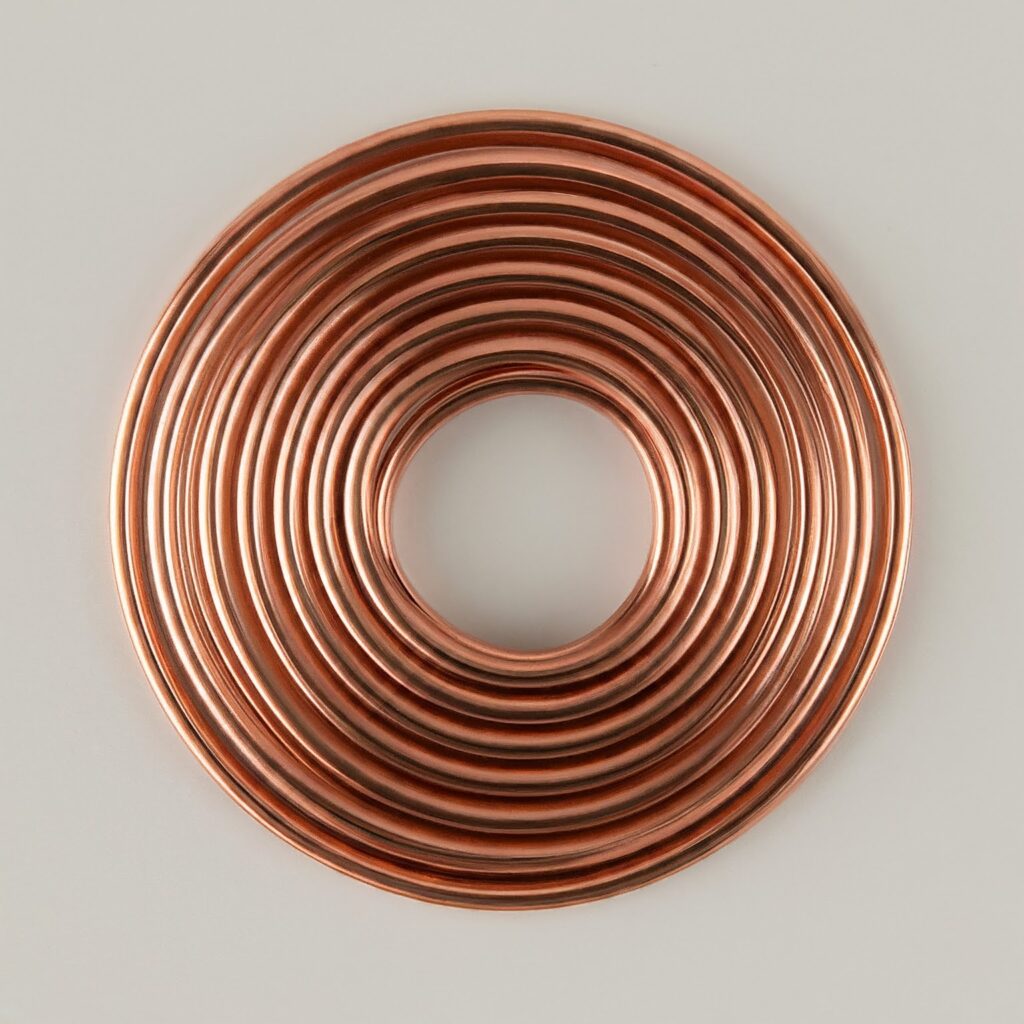
Understanding Wire Gauges: Basics
Wire gauges are crucial in determining the wire’s current-carrying capacity and resistance. The American Wire Gauge (AWG) system is the standard used to measure wire thickness in the United States. Here’s a foundational understanding of wire gauges:
The AWG System
- AWG Scale: The AWG scale ranges from smaller numbers (e.g., 0, 1, 2) to higher numbers (e.g., 20, 22, 24). A smaller AWG number means a thicker wire, while a larger number indicates a thinner wire.
- Measurement Units: The gauge number inversely relates to the diameter and cross-sectional area of the wire. For instance, a 14 AWG wire is thicker than a 24 AWG wire.
Importance in Electroculture
- Current Capacity: Thicker wires (lower AWG numbers) carry more current without overheating. This is vital for ensuring the system’s safety and efficiency.
- Resistance: Thicker wires have lower resistance, which reduces energy loss. This is particularly important in electroculture, where maximizing energy efficiency can influence plant growth positively.
Material Matters
- Copper vs. Aluminum: Copper wires are commonly preferred due to their higher conductivity compared to aluminum. However, aluminum is lighter and cheaper.
Choosing the Correct Gauge
- Length of Wire: Longer wire runs require thicker wires to minimize voltage drop. For example, a long extension running from a power source to an electroculture setup might necessitate a lower gauge wire.
- Application Type: Different electroculture applications might have varying current demands. Thus, understanding the specific requirements of the setup helps in selecting the correct gauge.
Practical Guidelines
- Consult Resources: Use wire gauge charts that match the specific parameters of the electroculture application.
- Safety First: Always consider the maximum current flow and choose a gauge that can safely handle the load without overheating.
Understanding these basics ensures an informed decision when selecting wire gauges for electroculture, optimizing both safety and performance.
How Wire Gauge Affects Electrical Resistance
Electrical resistance is a crucial factor when choosing wire gauge for electroculture applications. Wire gauge denotes the diameter of a wire, which directly affects its resistance. The American Wire Gauge (AWG) system is often used to categorize wire diameters.
Key Points:
- Inverse Relationship:
- Thicker wires (lower AWG numbers) have lower resistance.
- Thinner wires (higher AWG numbers) have higher resistance.
- Impact on Conduction:
- Low resistance in thicker wires ensures efficient electrical conduction.
- High resistance in thinner wires can lead to power loss.
- Heat Generation:
- Wires with higher resistance generate more heat.
- Excessive heat can compromise the wire’s insulation and surrounding components.
- Voltage Drop:
- Longer wires increase total resistance.
- Proper wire gauge minimizes voltage drop across the length of the wire.
Mathematical Relationship:
Resistance (R) can be calculated using the formula: [ R = \rho \left(\frac{L}{A}\right) ]
- R: Resistance
- (\rho): Resistivity of material
- L: Length of wire
- A: Cross-sectional area
Low-resistance wires enhance efficiency in electroculture systems, ensuring optimal electrical transmission.
Practical Considerations:
- Material Choice: Copper and aluminum are popular due to lower resistivity.
- Application Needs:
- Short distances can utilize thinner wires.
- Longer distances require thicker wires to prevent voltage drops.
- Environmental Factors: Ensure wire insulation can withstand environmental conditions like moisture.
Summary of Effects:
- Lower AWG (thicker wire) ensures minimal resistance and optimal current flow.
- Higher AWG (thinner wire) is more prone to energy loss and heat buildup.
- Gauge selection impacts efficiency, safety, and performance in electroculture systems.
These considerations emphasize the importance of selecting the appropriate wire gauge for effective and safe electroculture practices.
The Role of Wire Gauge in Energy Efficiency
Wire gauge plays a crucial role in determining the energy efficiency of an electroculture system. It influences several key factors that contribute to the overall performance of the system. Understanding the implications of wire gauge on energy efficiency helps in selecting the most suitable wire for specific applications.
Key Factors Influenced by Wire Gauge
- Resistance:
- The gauge of a wire determines its resistance. Thicker wires (lower gauge numbers) have less resistance compared to thinner wires (higher gauge numbers).
- Lower resistance means less energy loss as heat, which increases the energy efficiency of the system.
- Voltage Drop:
- Voltage drop across a wire occurs due to the resistance it presents. A higher resistance results in a greater voltage drop.
- Keeping the voltage drop minimal ensures more efficient power transmission and reduces energy losses.
- Heating:
- Wires with higher resistance generate more heat. Excessive heating can lead to insulation damage, energy loss, and potential hazards.
- Using an appropriate wire gauge reduces the heating effect and improves the system’s reliability and efficiency.
- Current Carrying Capacity:
- The current-carrying capacity, or ampacity, is directly related to the wire gauge. Thicker wires can carry more current without overheating.
- Ensuring that the wire can handle the required current load without exceeding its ampacity is essential for maintaining energy efficiency.
Practical Considerations
- Length of the Wire:
- Longer wires increase resistance and potential energy losses. Selecting the correct gauge becomes even more critical for longer runs to maintain efficiency.
- Material:
- The material of the wire also affects resistance. Copper, for instance, has lower resistance compared to aluminum, influencing the choice of gauge.
- Application-Specific Needs:
- Different electroculture applications have varying power requirements. Selecting the correct wire gauge tailored to the specific needs of the equipment used ensures optimal energy efficiency.
Calculating the Right Gauge
Several tools and calculators are available to determine the appropriate wire gauge based on specific parameters like current, voltage, and length.
- Tables and Charts:
- Standard wire gauge charts help in making informed decisions.
- Online Calculators:
- Numerous online calculators can simplify the process, accounting for all variables to provide precise recommendations.
Selecting the correct wire gauge ensures energy-efficient operation, minimizes energy losses, and enhances the longevity and reliability of the electroculture system.
Choosing the Right Material: Copper vs. Aluminum
When deciding between copper and aluminum for electroculture wire, it is essential to consider their conductive properties, cost, and suitability for the application. Both materials have distinct advantages and disadvantages.
Conductivity
- Copper: Known for its superior electrical conductivity, copper is the preferred choice for many electrical applications. Its high conductivity ensures minimal energy loss, making it efficient for transferring electrical currents.
- Aluminum: While not as conductive as copper, aluminum offers adequate conductivity for a variety of applications. It requires a larger gauge than copper to carry the same current.
Cost
- Copper: Generally more expensive than aluminum, the higher cost of copper can be a significant factor, especially for larger projects or when budget constraints are a concern.
- Aluminum: More affordable, aluminum serves as a cost-effective alternative. Its lower price makes it attractive for extensive wiring projects where cost savings are critical.
Weight
- Copper: Heavier compared to aluminum, copper’s weight might be a disadvantage in scenarios where wire weight is crucial, such as aerospace applications.
- Aluminum: Considerably lighter, aluminum is advantageous in weight-sensitive environments. This characteristic can simplify handling and installation.
Durability and Strength
- Copper: Offers excellent durability and tensile strength, making it suitable for harsh environments. Copper wires withstand wear and mechanical damage better than aluminum.
- Aluminum: While aluminum is durable, it is softer and more susceptible to damage and breaking under mechanical stress.
Corrosion Resistance
- Copper: Known for its superior corrosion resistance, copper is less likely to suffer from oxidation, ensuring longevity and consistent performance.
- Aluminum: Prone to oxidation, aluminum forms a protective oxide layer that resists corrosion to some extent, albeit not as effectively as copper.
Thermal Performance
- Copper: Better thermal performance, less likely to overheat, enhances safety in high-current applications.
- Aluminum: Good thermal efficiency but requires careful installation to avoid overheating due to higher resistance compared to copper.
In electroculture, the choice between copper and aluminum depends on the specific needs and constraints of the project. Each material brings unique attributes that must be weighed to determine the most suitable option.
Determining Your Electroculture System’s Power Needs
Understanding the power requirements for an electroculture system is essential for optimal performance and safety. Here’s how to determine the power needs:
- Identify System Components
- Categorize each component in the electroculture system: power source, wires, electrodes, and any additional elements like sensors or controllers.
- Calculate Power Consumption
- Determine the voltage (V) and current (I) for each component. Use the formula:
[ \text{Power} (W) = \text{Voltage} (V) \times \text{Current} (I) ] Sum the power consumption of all components to get the total system power requirement.
- Determine the voltage (V) and current (I) for each component. Use the formula:
- Consider the Power Source
- Check specifications of the power source, whether it’s a battery, solar panel, or mains electricity. Ensure it can supply the total calculated power with some margin for efficiency and safety.
- Account for Load Variations
- Assess the variability in power demand over time. Some systems may have constant power needs, while others might experience peaks. Ensure the system supports peak loads without failure.
- Evaluate Wire Length
- Longer wires introduce more resistance, resulting in power loss. Use the formula: [ \text{Power Loss} (W) = I^2 \times R ] where (R) is the resistance of the wire which depends on length, material, and cross-sectional area.
- Environmental Considerations
- Factor in ambient temperature, which affects components’ performance and wire resistance. Higher temperatures increase resistance, impacting power delivery.
- Safety Margins and Redundancies
- Implement safety margins for critical components. Utilize redundant power sources or wires to ensure reliability and continuous operation even during component failures.
- Verify with Manufacturer Specifications
- Always cross-check calculations with manufacturer datasheets of components to confirm compatibility and safe operation limits.
Following this structured approach ensures a reliable and efficient electroculture system, minimizing risks and enhancing operational lifespan.
Calculating the Correct Wire Gauge for Your Setup
Calculating the correct wire gauge for an electroculture setup involves several key factors. The objective is to ensure that the wire gauge selected can handle the electrical load without overheating or causing a fire hazard. It is critical to perform these calculations accurately.
Understanding Ampacity
Ampacity refers to the maximum amount of electric current a conductor or device can carry before sustaining immediate or progressive deterioration. Determining the ampacity needs involves:
- Evaluating Current Requirements:
- Calculate the total current your setup will draw.
- Sum up the amperage ratings of all devices connected to ensure you cover the maximum load.
- Wire Material:
- Copper wires are often preferred for their superior conductivity.
- Alternatively, aluminum can be used but requires a larger gauge for the same current rating.
- Insulation Type:
- Different insulation materials can withstand different temperatures.
- Higher temperatures generally reduce ampacity due to increased resistance.

Calculating Voltage Drop
Voltage drop is the reduction in voltage in an electrical circuit between the source and load. Factors include:
- Wire Length:
- Longer wire runs increase resistance and lead to greater voltage drops.
- To minimize, select a thicker gauge.
- Current Flow:
- Higher currents result in a more significant voltage drop.
- Ensure power efficiency by selecting an appropriate gauge to handle the intended current.
Using Wire Gauge Charts
Wire gauge charts serve as a reference to match your calculated ampacity and voltage drop needs:
- Locate Specifications:
- Charts typically list gauges along with ampacity ratings.
- Cross-reference your load requirements with the chart for correct sizing.
- Environment Considerations:
- Correct wire gauge selection can vary depending on whether the wire is run indoors, outdoors, or buried.
- Account for environmental factors and de-rating values as specified in guidelines.
Safety Margins
Adding safety margins can ensure reliability and longevity:
- Buffer for Future Expansion:
- Choose a slightly larger gauge if future load increase is anticipated.
- This prevents the need for rewiring when adding more devices.
- Electrical Codes and Standards:
- Follow local electrical codes and safety standards.
- Non-compliance can lead to hazards and legal issues.
These calculations are crucial for a safe and efficient electroculture setup. Accurate wire gauge selection ensures longevity, reliability, and safety in all electrical applications within the system.
Common Wire Gauge Standards and Specifications
Wire gauge standards are critical for ensuring consistent and safe electrical performance, particularly in electroculture. The American Wire Gauge (AWG) system is the most commonly used standard in North America, while the Standard Wire Gauge (SWG) is often used in the UK and other parts of the world.
American Wire Gauge (AWG)
The AWG system, established in 1857, is logarithmic. Each gauge number corresponds to a specific diameter and cross-sectional area:
- Sizing: Lower AWG numbers denote thicker wires (e.g., 2 AWG is thicker than 12 AWG).
- Wire Diameter: 10 AWG wire has a diameter of 2.588 mm (0.102 inches) while 20 AWG wire has a diameter of 0.812 mm (0.032 inches).
- Resistance and Ampacity: Thicker wires (lower AWG) have lower resistance and can handle higher current loads.
Standard Wire Gauge (SWG)
SWG, primarily used in the UK, differs from AWG:
- Sizing: Like AWG, lower SWG numbers indicate thicker wires.
- Differences: The diameters for certain gauge numbers can vary significantly from AWG. For example, 10 SWG wire has a diameter of 3.25 mm, which is significantly thicker than 10 AWG wire.
- Applications: Although similar in usage, exact specifications may differ, necessitating conversion or consultation of standard tables when swapping between AWG and SWG.
Factors Influencing Choice
Application Requirements
- Voltage Levels: Higher voltage applications typically require thicker wire to prevent overheating and ensure safety.
- Current Carrying Capacity: Higher current applications necessitate lower gauge numbers.
Material Consideration
- Copper vs. Aluminum: Copper wires have higher conductivity than aluminum and can typically use a higher gauge (thinner wire) compared to aluminum for the same ampacity and distance.
Environmental Conditions
- Outdoor vs. Indoor: Wires exposed to harsh conditions or moisture need thicker insulation and potentially lower gauge for durability.
Conversion Between AWG and SWG
Understanding the conversion between AWG and SWG is crucial:
- Tables and Charts: Use standard conversion tables for accurate comparison.
- Tools: Various online tools and resources can assist in converting and selecting appropriate gauge.
By adhering to established standards and understanding the unique specifications of AWG and SWG, individuals can make informed decisions in electroculture applications. These standardized systems ensure reliability, safety, and optimal performance in the cultivation process.
American Wire Gauge (AWG) vs. Standard Wire Gauge (SWG)
When selecting the appropriate wire gauge for electroculture projects, understanding the differences between American Wire Gauge (AWG) and Standard Wire Gauge (SWG) is essential. Each system has its own characteristics, making them suitable for different applications.
American Wire Gauge (AWG):
- Origin: Developed in the United States.
- Usage: Common in North America for electrical wiring and electronics.
- Measurement: AWG uses a descending scale, where larger numbers represent smaller diameters.
- Example: A 12 AWG wire is thicker than a 22 AWG wire.
- Units: Diameter is typically measured in millimeters or inches.
Standard Wire Gauge (SWG):
- Origin: Originated in the United Kingdom.
- Usage: Widely used in the UK and other countries following the British standards.
- Measurement: SWG also uses an inverse numbering system but differs from AWG in numerical values and actual wire diameters.
- Example: A 12 SWG wire is thicker than a 22 SWG wire but differs from 12 AWG wire in actual thickness.
- Units: Diameter is measured in millimeters or inches, similar to AWG but with different values.
Key Differences:
- Numeric Value Differences:
- An AWG wire and an SWG wire with the same numeric gauge will have different physical diameters.
- Material:
- AWG and SWG may apply to different materials, such as copper or aluminum, influencing resistance and use-case scenarios.
- Applications:
- While both are used for electrical applications, regional preferences often dictate which system is used. AWG is more prevalent in North American projects, and SWG is more common in British-influenced regions.
Conversion:
- Conversion between AWG and SWG is not directly proportional. Reference tables or online converters are essential for accurately matching specifications across the two systems.
Understanding the distinctions between AWG and SWG allows practitioners of electroculture to make informed decisions regarding wire selection. Proper gauge choice ensures optimal performance, safety, and efficiency in applications, directly impacting the success of electroculture projects.
Factors Influencing Wire Gauge Selection
When selecting the appropriate wire gauge for electroculture, several key factors must be considered to ensure efficiency, safety, and optimal performance.
1. Electrical Current Load
- The wire gauge must support the anticipated electrical current. Using an undersized wire can lead to overheating and potential fire hazards.
- It is important to calculate the maximum current load and select a wire gauge that accommodates it.
2. Distance and Voltage Drop
- The length of the wire significantly impacts its performance. Longer distances can result in higher voltage drops, which reduces the efficiency of electroculture systems.
- Selecting a larger wire gauge can minimize voltage drop over extended distances, thereby improving the system’s effectiveness.
3. Environmental Conditions
- Various environmental factors such as temperature, humidity, and exposure to chemicals impact wire selection.
- Wires in harsh conditions require coatings or materials that resist corrosion and degradation to maintain safety and performance.
4. Soil Composition
- The type of soil where the electroculture system is installed influences the wire gauge.
- Soils with higher moisture content or salt levels can accelerate wire corrosion, necessitating a thicker gauge for durability.
5. Material of the Wire
- The wire’s material, such as copper or aluminum, affects its conductivity and flexibility.
- Copper wires are preferred for their high conductivity and strength; however, aluminum wires are lighter and more cost-effective.
6. Regulatory Standards and Codes
- Compliance with local and international electrical codes ensures safety and legality.
- The National Electrical Code (NEC) and other relevant standards provide guidelines on minimum wire gauge requirements based on load and application.
7. Cost Considerations
- Although larger gauge wires offer better performance, they are more expensive.
- Consider a balance between performance needs and budget constraints to select an appropriate wire gauge.
8. Installation and Maintenance
- The ease of installation and maintenance should not be overlooked.
- Thicker wires are more difficult to handle and require more robust support structures, impacting labor and material costs.
By considering these factors, one can select the optimal wire gauge for an effective and safe electroculture system.
The Impact of Wire Length on Gauge Choice
Selecting the appropriate wire gauge for electroculture depends significantly on the length of the wire. Longer distances can lead to increased resistance, affecting the performance of the wire. Understanding the relationship between wire length and gauge is essential for ensuring optimal functionality in electroculture applications.
Resistance and Voltage Drop
- Resistance: The resistance of a wire increases with its length. More resistance means more energy is lost as heat, which can be problematic in long-distance applications.
- Voltage Drop: A longer wire can experience more voltage drop, diminishing the efficiency of power delivery. This can negatively impact the effectiveness of electroculture systems.
Recommended Practices
To mitigate the impact of wire length on performance, consider the following strategies:
- Use Thicker Wire: Opt for a lower gauge (thicker wire) for longer distances. This reduces resistance and minimizes voltage drop.
- Shorten Distance: Whenever possible, reduce the distance the wire must cover. This helps maintain the integrity of the electrical current.
- Quality Materials: High-quality materials with lower resistance properties should be selected to enhance performance over longer distances.
Calculating the Right Gauge
To choose the correct gauge based on length, follow these guidelines:
- Calculate Total Length: Determine the total length the wire must cover, including all turns and loops.
- Refer to Charts: Use wire gauge charts that account for length and current requirements. These charts provide guidelines to identify the suitable wire gauge for specific setups.
Note: Charts often include important metrics such as resistance per unit length, maximum current capacity, and voltage drop indication. Utilizing these resources ensures an accurate gauge choice.
Practical Examples
- Short Distance (up to 10 feet): For short distances, standard gauges like 14 or 16 might suffice without significant resistance or voltage drop issues.
- Medium Distance (10-20 feet): In medium distances, consider moving to a lower gauge such as 12 or 10 to maintain efficiency.
- Long Distance (over 20 feet): For longer distances, opt for even lower gauges like 8 or 6 to ensure minimal resistance and efficient power transmission.
Final Considerations
Carefully assess the wire length in electroculture setups, and adapt the wire gauge choice accordingly. By doing so, one can maintain efficient energy use, enhance system performance, and optimize the benefits of electroculture.
Safety Considerations in Wire Gauge Selection
Selecting the correct wire gauge for electroculture is pivotal in ensuring safe, efficient, and reliable operation. Safety considerations help in preventing hazards such as overheating, electrical fires, and inadequate performance. Several critical factors must be evaluated:
- Current Capacity and Ampere Rating:
- The wire gauge must handle the maximum current that will flow through it. Overloading a thin wire can cause it to overheat and potentially ignite.
- Reference standard ampacity charts to match wire gauge with the expected current level.
- Voltage Drop:
- Excessive voltage drop can lead to inefficient operation and potential damage to electrical components.
- Ensure the selected wire minimizes voltage drop, especially for longer distances.
- Ambient Temperature:
- Higher ambient temperatures can reduce the current-carrying capacity of the wire.
- Consult derating factors for different temperatures to choose an adequate wire gauge.
- Material of the Wire:
- Copper and aluminum are the most commonly used materials.
- Copper wires have better conductivity and thermal performance but may cost more than aluminum wires.
- Insulation Type and Rating:
- Insulation must be suitable for both the operating voltage and environmental conditions (e.g., wet, dry, indoor, or outdoor).
- Select wires with insulation ratings that match or exceed the application needs.
- Installation Factors:
- Consider routing and installation methods, including the need for conduits, securing, and exposure to mechanical stress.
- Avoid sharp bends and excessive pressure on the wire which might degrade insulation and eventually cause shorts.
- Compliance with Codes and Standards:
- Adhere to local and international electrical codes (e.g., National Electrical Code (NEC)) to ensure safety compliance.
- Verify regulatory requirements specific to electroculture applications.
- Wire Length and Resistance:
- Longer lengths of wire contribute to increased resistance, leading to potential overheating.
- Factor in the total length of wiring run when determining the appropriate gauge.
- Short Circuit Considerations:
- Adequate selection of wire gauge helps in minimizing risks associated with short circuits.
- Implement proper fusing or circuit breakers according to the wire gauge specifications.
For those engaged in electroculture, understanding these safety considerations is essential. Ensure that research and due diligence are performed to choose wire gauges that not only meet but exceed standard safety measures.
Practical Tips for Measuring and Cutting Wire
Accurately measuring and cutting wire is essential in electroculture projects to ensure efficiency and safety. Here are some practical tips to assist:
Tools Needed
- Measuring Tape or Ruler:
- Choose a durable measuring tape that includes both metric and imperial units.
- Wire Cutters:
- Use quality wire cutters suited to the gauge and type of wire being used.
- Caliper:
- A digital caliper can provide precise measurements of wire diameter and ensure the correct gauge selection.
Measuring Wire Length
- Determine the Required Length:
- Assess the length needed for the specific application, considering any bends or loops.
- Mark the Wire:
- Use a permanent marker to mark the wire at the required length to avoid mistakes.
- Double-Check Measurements:
- Before cutting, verify the measurements to prevent any waste or shortage of wire.
Cutting Wire
- Secure the Wire:
- Securely hold or clamp the wire to ensure stability before cutting.
- Position Wire Cutters:
- Place the wire cutters perpendicular to the wire for a clean, straight cut.
- Cut in One Motion:
- Apply firm and steady pressure to cut the wire in one motion to avoid frayed ends.
Safety Tips
- Wear Safety Glasses:
- Protect your eyes from potential flying wire fragments.
- Use Gloves:
- Use gloves to protect your hands from cuts or abrasions.
- Maintain Tools:
- Regularly inspect and maintain your cutting tools to ensure they are sharp and functional.
Handling Different Gauge Wires
- Light Gauge Wires (20 gauge and thinner):
- These can be cut with standard wire cutters without much force.
- Medium Gauge Wires (14-18 gauge):
- Require moderate force and possibly stronger cutters for a clean cut.
- Heavy Gauge Wires (10-12 gauge and thicker):
- Often need heavy-duty cutters or even bolt cutters for efficiency and safety.
By following these tips, practitioners can effectively measure and cut wires, leading to better results in their electroculture projects.
Common Mistakes in Choosing the Wrong Wire Gauge
Selecting the appropriate wire gauge is critical in electroculture systems. Here are some common mistakes people make:
- Underestimating Current Requirements: Often, individuals use wire gauges that are too small for the current they need to carry. Undersized wires can overheat, posing a fire hazard and reducing system efficiency.
- Ignoring Environmental Factors: Some people neglect the environmental conditions that can affect wire performance. For instance, high temperatures can cause wire insulation to deteriorate faster.
- Overloading Circuits: Choosing a wire gauge that doesn’t match the system’s load can overload circuits, compromising safety and performance.
- Wrong Wire Type: Using wire types not suited for specific applications, like using solid-core wire instead of stranded wire in scenarios requiring flexibility, can lead to system inefficiency and potential breaks.
- Improper Installation: Failing to install wires correctly, such as not securing connections tightly, can lead to increased resistance and potential short circuits.
Other frequent errors include:
- Mismatched Electrical Components: Using wires incompatible with connected components, which can lead to voltage drops and inefficiencies.
- Failure to Consider Voltage Drops: Not accounting for voltage drops over long distances may result in power loss and suboptimal system performance.
- Relying on Incorrect Information: Sometimes people rely on outdated or incorrect charts to choose wire gauge, leading to inappropriate choices.
- Overlooking Safety Codes: Ignoring local electrical codes and regulations can result in unsafe installations and legal issues.
Key considerations to avoid these pitfalls:
- Proper Planning: Conduct detailed planning to determine the exact current, voltage, and environmental conditions the wire will face.
- Consult Reliable Sources: Use up-to-date and trusted sources like manufacturer guidelines or professional electricians for wire gauge recommendations.
- Regular Inspection: Periodic inspection and maintenance can identify and rectify potential issues early, ensuring the safety and efficiency of the electroculture system.
Avoiding these common mistakes can significantly impact the reliability, safety, and effectiveness of an electroculture system.
Advanced Electroculture Techniques and Wire Gauge
Advanced electroculture techniques often require precise wire gauges to optimize plant growth and health. Understanding the appropriate wire gauge for specific techniques can significantly impact the effectiveness of electroculture practices.
- Stimulation with Low-Voltage Currents:
- Low-voltage currents can enhance root development and nutrient uptake.
- Typical wire gauges used: 20-24 AWG.
- These finer wires offer less resistance and are ideal for delivering low-voltage currents effectively.
- Atmospheric Electrical Stimulation:
- Utilizes ambient atmospheric electricity to stimulate plant growth.
- Common wire gauges: 18-22 AWG.
- Medium gauges balance conductivity and durability, ensuring efficient atmospheric current harnessing without excessive weight.
- Capacitive Coupling:
- Employs capacitive discharge methods to release electrical energy into the soil.
- Wire gauges: 16-20 AWG.
- Requires thicker wires to handle higher voltages and frequent discharges, maintaining safety and performance.
- Galvanic Autotroph Stimulation:
- Uses galvanic cells to produce a small, continuous electrical current.
- Recommended wire gauges: 14-18 AWG.
- Thicker wires are necessary to maintain steady current flow from galvanic reactions, supporting extended plant growth phases.
- Electrostatic Field Applications:
- Creates an electrostatic field to influence plant physiology.
- Suitable wire gauges: 12-16 AWG.
- Ensuring minimal resistance and high durability is critical, thus thicker wires are used for stability and longevity.
To select the correct wire gauge for these advanced techniques, one must consider:
- Current Load:
- Higher current demands thicker wires to prevent overheating and voltage drop.
- Environmental Factors:
- Outdoor setups may require additional insulation and durability features, impacting wire selection.
- Installation Complexity:
- More intricate systems might benefit from flexible, thinner wires for ease of installation despite the increased complexity in stabilization.
Ultimately, matching the wire gauge to the specific electroculture technique and environmental conditions ensures optimal plant growth and system efficiency.
Benefits of Using the Correct Wire Gauge
Choosing the correct wire gauge for electroculture offers several advantages that directly impact efficiency and safety. These benefits extend across the various aspects of the system, ensuring it operates optimally.
Enhanced Efficiency
- Optimal Current Flow: Correct gauge wire allows for ideal current flow, reducing resistance and energy loss.
- Reduced Heat: Appropriately gauged wires minimize heat build-up, enhancing overall system efficiency.
- Power Consumption: Using the correct gauge can lower power consumption by preventing unnecessary energy loss.
Improved Safety
- Prevents Overheating: Properly gauged wires prevent overheating, which could lead to fires or equipment damage.
- Load Handling: Ensures the system handles the electrical load without strain, reducing the risk of short circuits.
- Durability: Correct wire gauge extends the lifespan of the wiring, preventing frequent replacements and repairs.
Reliability
- Consistency: Accurate wire gauge maintains consistent performance, avoiding potential downtimes.
- Signal Integrity: In electroculture, proper gauge ensures signal integrity for optimal functioning of sensors and controllers.
- System Stability: Correct wire gauge supports stable operation, which is critical for maintaining the health of agricultural projects.
Cost-Effectiveness
- Reduced Maintenance: Using the correct gauge reduces the need for frequent maintenance, saving time and money.
- Energy Savings: Less energy wasted on heat means lower electricity bills.
- Resource Efficiency: Optimized wire use leads to resource savings, promoting a more sustainable system.
Ease of Installation
- Simpler Connections: Correct gauge wires are easier to handle and connect, making installations straightforward.
- Fewer Tools Needed: Often, using appropriate wire gauge requires fewer specialized tools for connections.
Compatibility
- Interfacing with Equipment: Ensuring the wire gauge matches the requirements of all connected equipment avoids compatibility issues.
- Standardization: Adheres to industry standards, facilitating easier integration and troubleshooting processes.
Performance Optimization
- Electromagnetic Interference Reduction: Proper gauge minimization of electromagnetic interference ensures clearer signal transmission.
- Voltage Drop Mitigation: Correct gauge minimizes voltage drops over distances, maintaining consistent power levels.
Using the correct wire gauge in electroculture not only optimizes system performance but also promotes safety, reliability, and cost-efficiency, making it an indispensable aspect of any efficient setup.
Troubleshooting and Maintenance for Electroculture Wires
Proper maintenance ensures the longevity and efficiency of electroculture systems. Regularly scheduled inspections and timely troubleshooting are crucial. Below are steps and tips to help maintain and troubleshoot electroculture wires effectively.
- Visual Inspection
- Check for visible signs of wear and tear.
- Look for corrosion, especially if the system is exposed to moisture.
- Ensure insulation is intact to prevent short circuits.
- Electrical Testing
- Use a multimeter to check the continuity of the wires.
- Test the voltage levels to ensure they stay within the recommended range.
- Check for unexpected resistance, which may indicate damaged connections.
- Connection Checks
- Inspect all connectors and terminals.
- Tighten any loose connections.
- Clean the contacts to remove any oxidation or debris.
- Common Issues and Solutions
- Corrosion: Apply anti-corrosion spray to affected areas after cleaning.
- Breaks or Cuts: Use electrical tape or heat shrink tubing for minor repairs; replace wires for extensive damage.
- Poor Conductivity: Ensure wire gauge is appropriate; too thin wires might overheat or underperform.
- Preventive Measures
- Install protective conduit or tubing around wires in high-risk areas.
- Use weatherproof connectors for outdoor systems.
- Schedule monthly inspections to catch and address small issues before they become major problems.
- Wire Replacement
- Choose the correct wire gauge as per the initial setup requirements.
- Ensure compatibility with the existing system’s voltage and current specifications.
- Safely dismantle the old wires and replace them using appropriate tools and techniques.
- Environmental Considerations
- Keep the installation area dry and sheltered from the elements when possible.
- Monitor for animal interference; consider protective measures such as mesh or tubing.
- Safety Protocols
- Always turn off the system before performing any maintenance or troubleshooting.
- Wear appropriate personal protective equipment such as gloves and safety glasses.
- Follow manufacturer guidelines for any specific maintenance requirements.
Regular attention and maintenance of electroculture wires not only prolongs the life of the system but also ensures optimal performance. Adhering to these guidelines helps in the early detection of problems and effective resolution, ensuring that the electroculture system functions efficiently.
How to Upgrade Your Electroculture System
Upgrading an electroculture system involves several key steps to ensure enhanced efficiency and effectiveness. First, assess the current system’s components and performance levels. Identifying the areas that require an upgrade can save time and resources.
Assess Current Performance
- Evaluate Yield Output: Compare the current crop yield with previous data.
- Check Wire Integrity: Inspect for corrosion, breaks, and overall conductivity.
- Assess Power Source: Confirm the power source’s stability and capacity.
Choose the Right Wire Gauge
Selecting the correct wire gauge is crucial for system efficiency. Follow these steps:
- Determine Power Requirements: Calculate the power needs based on crop size and field dimensions.
- Select Appropriate Gauge: Refer to wire gauge charts relevant to the power requirements.
- Consider Material: Copper is recommended for its high conductivity, but aluminum is lighter and cheaper.
Upgrade System Components
- Replace Old Wires: Use the selected wire gauge to replace outdated or worn-out wires.
- Enhance Power Supply: Upgrade to a more robust power source if necessary, ensuring it can handle the new system’s demands.
- Install Controllers: Modern controllers and sensors provide better regulation and data collection.
Implement Advanced Technologies
- Sensors: Add sensors to monitor soil moisture and temperature.
- Automated Systems: Incorporate automation for adjusting voltage levels based on environmental conditions.
- Remote Monitoring: Use IoT devices to monitor the system remotely, ensuring efficient operation.
Maintenance and Testing
- Regular Inspections: Schedule frequent checks to catch any issues early.
- Conduct Tests: Regularly test soil conductivity and voltage levels.
- Maintenance Logs: Keep detailed logs of all maintenance activities and observations.
Enhancing an electroculture system by upgrading components, integrating advanced technologies, and regular maintenance ensures a higher yield and system longevity. Following these guidelines helps in achieving a more efficient and effective electroculture setup.
Conclusion: Optimizing Your Electroculture with the Right Wire Gauge
Choosing the correct wire gauge for electroculture is crucial for achieving optimal results in agricultural practices. Various factors influence the selection of wire gauge, including:
- Electrical Conductivity: Thicker wires generally provide better electrical conductivity, allowing for more efficient energy transfer.
- Durability: Thicker wires are better suited for long-term applications as they are less prone to breakage and can withstand environmental wear and tear.
- Cost: Thicker wires are usually more expensive. Balancing conductivity, durability, and cost is essential for practical applications.
Key Considerations
To optimize electroculture:
- Gauge Selection:
- Use thin wires (e.g., 22 AWG or 24 AWG) for small-scale applications and short distances.
- Opt for medium wires (e.g., 18 AWG or 20 AWG) for moderate distances and standard farm setups.
- Choose thick wires (e.g., 14 AWG or 16 AWG) for large-scale applications where durability and conductivity are paramount.
- Insulation:
- Ensure proper insulation to prevent electrical leakage and protect against moisture and physical damage.
- Select materials that are UV resistant and suitable for outdoor applications.
- Installation:
- Proper installation is crucial for effective electroculture. Secure connections and avoid areas prone to physical damage.
- Employ techniques like braiding or coiling where necessary to enhance durability and performance.
- Maintenance:
- Regularly inspect wires for signs of wear, corrosion, or damage.
- Replace any compromised sections promptly to maintain the system’s efficiency.
- Environmental Factors:
- Consider environmental conditions such as humidity, temperature, and chemical exposure.
- Choose wire types and insulation materials that resist environmental degradation.
Practical Applications
- For greenhouse setups, thin to medium gauge wires are typically sufficient due to shorter distances and controlled environments.
- For open-field electroculture, thicker wires ensure better conductivity and durability against weather impacts.
Summary
By carefully considering the application requirements and environmental factors, farmers can optimize their electroculture setups. Selecting the right wire gauge enhances energy efficiency, ensures system longevity, and ultimately contributes to better crop yields.

